
How to Filter Lookup Fields in Microsoft Dynamics 365 CRM

In Dynamics 365, we can filter lookup fields without writing code. In this post, we will look at an out of the box field example and a custom example.
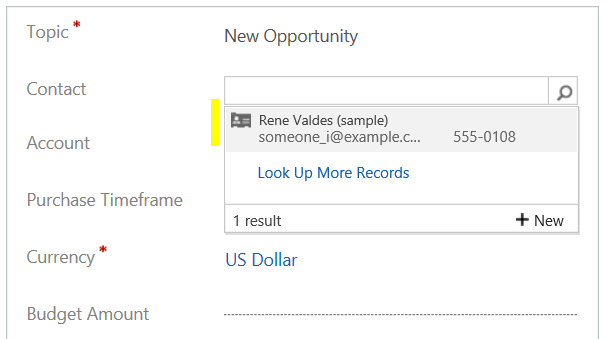
The common out of the box example is filtering a contact based on an account. If we create a new Opportunity, we can see if we look at the Contacts field, we see all contacts in the system:
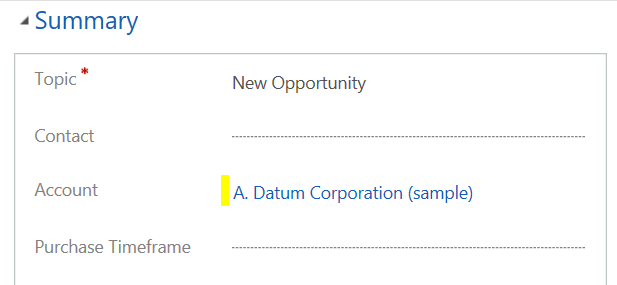
And the same with Accounts:
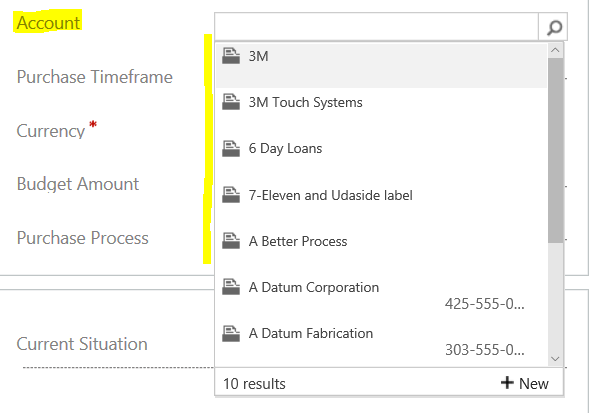
If we were to select an Account or a Contact, it won’t filter the corresponding field. E.g. if we selected 3M as the account, it would be useful if the system only showed us contacts for 3M, but this is not the case. Likewise, selecting a contact that belongs to A Datum Corporation does not filter the account to A Datum Corporation.
In order to achieve this, we can use the Related Records Filtering property on the Contact field. Open the form in design view, and select the Contact field, then click Change Properties:
You will see Related Records Filtering:
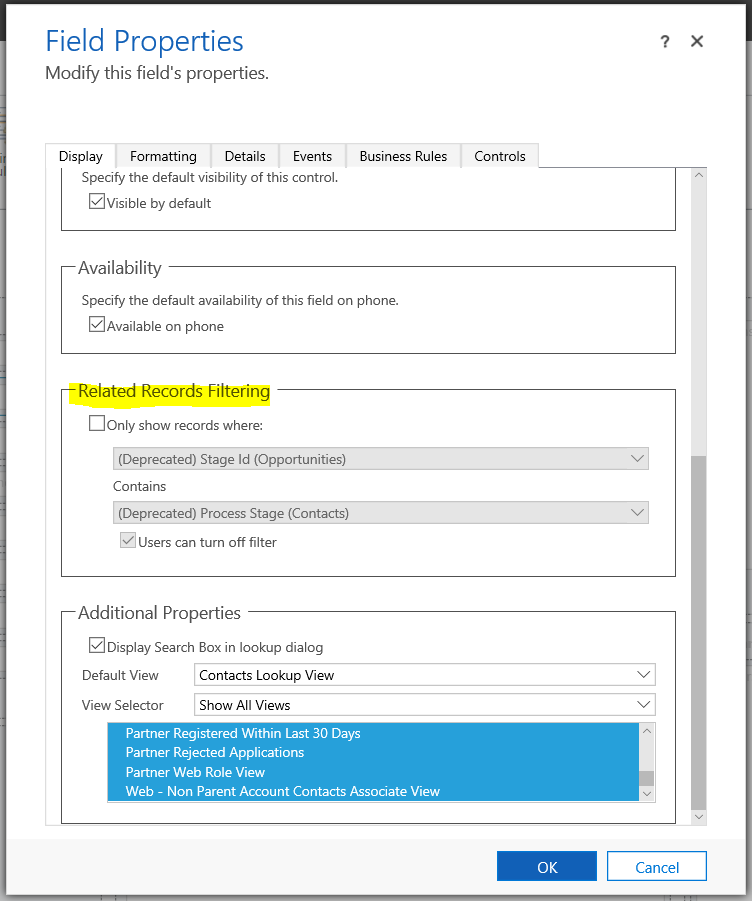
Click the checkbox, and select to only show records where Account (Opportunities) Contains Accounts (Primary Contact).
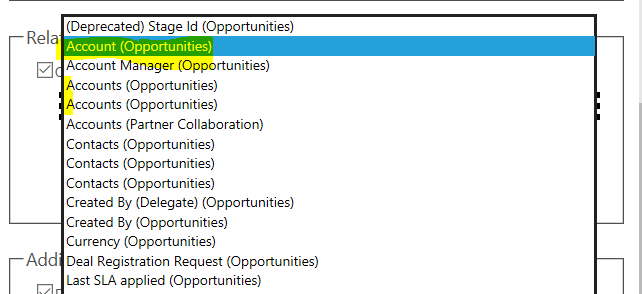
Note you may see multiple occurrences of Account (Opportunities), as there are multiple relationships defined between Accounts and Contacts. You will need to select the right one that contains Accounts (Primary Contact):
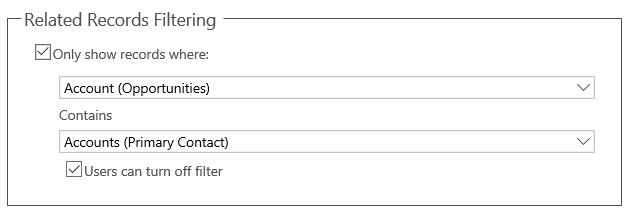
It should then look like below:
Now, create a new opportunity, and select an Account:
Now use the drop down to select a contact. You will see the contacts have been filtered to only show the primary contact for this account, as selected on the account record:
Note the related records filtering is based on the relationships. In the above example, we can see the following options:
  • Accounts (Contacts)
  • Accounts (Created by Portal Contact)
  • Accounts (Primary Contact)
  • Company Name (Accounts) (Contacts)
  • Managing Partner (Managed Contacts)
These are based on the Account-Contact relationships.
If we look at the 1:N relationships for Accounts, we can see the following for Contacts:
If we look at the N:1 relationships for Accounts, we can see the following for Contacts:
Now for the custom example. Let’s say we have 2 custom entities, Country and City. We would like to filter the city based on the country selected.
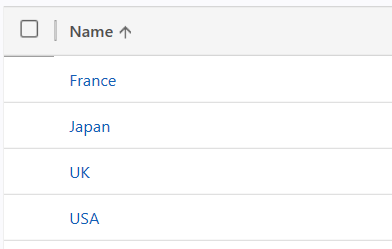
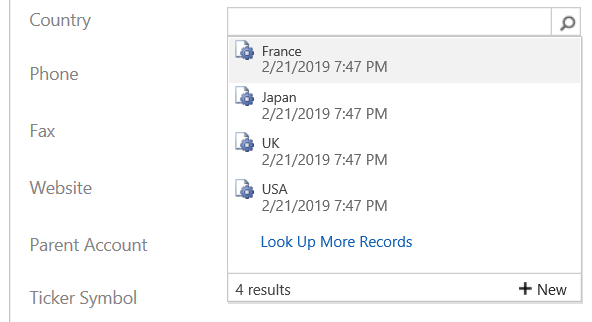
Our Countries list looks like:
We will add a lookup field to the City entity called Country:
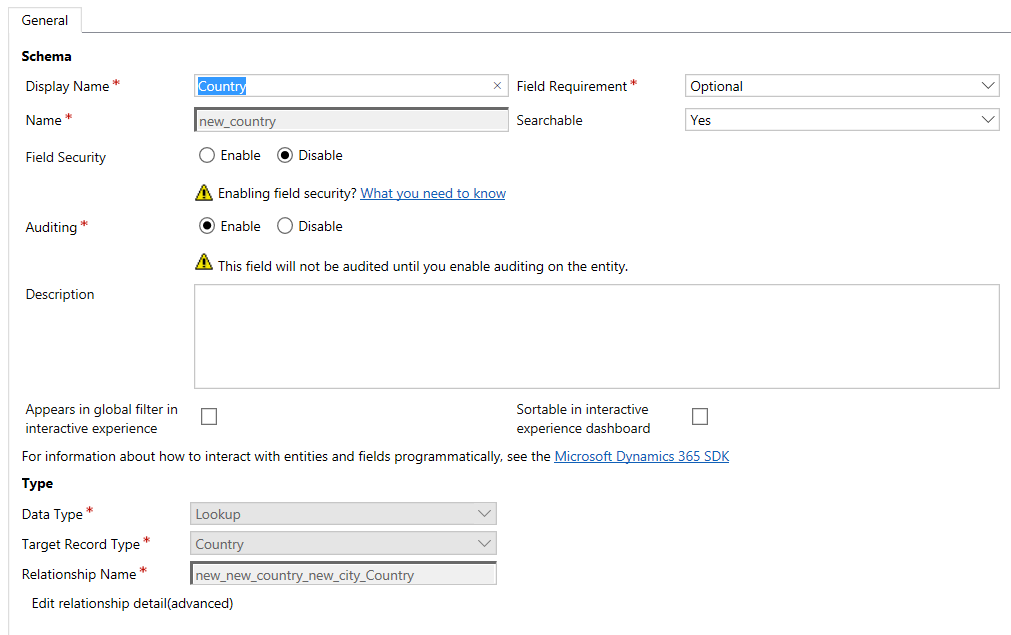
This will create a N:1 relationship:
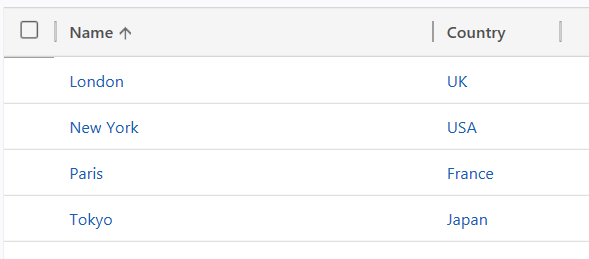
Our cities now look like this, with the associated country filled in:
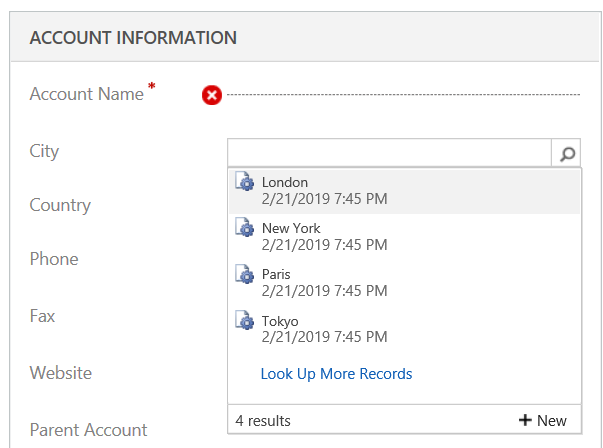
Now on the Account form, add the 2 new fields, save and publish. If we were to select a country and then a city, we would not yet get the filter:
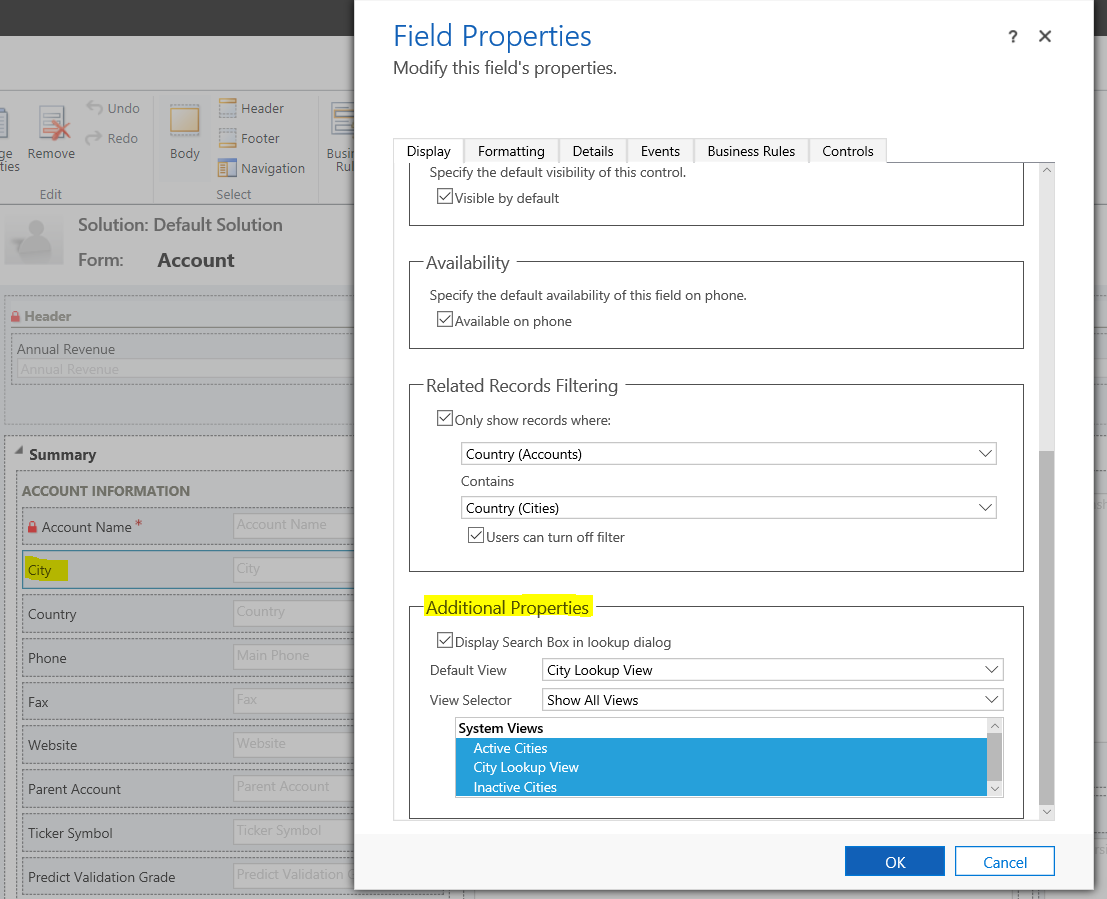
The final step is to add the Related Record Filter on the City field on the Accounts form:
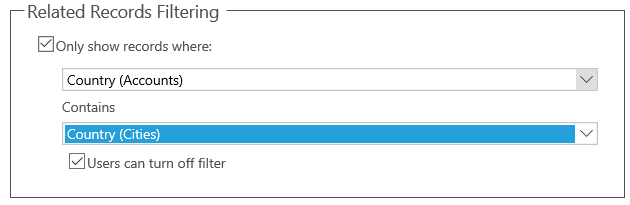
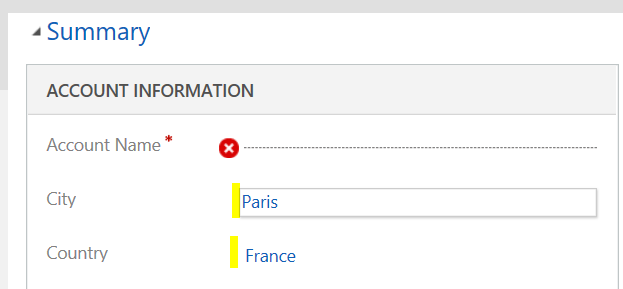
Now, when we select a country on the Account form, it will be filtered to only show cities relating to that country:


Other Usefull Links
 Dynamics 365: Lookup Field Filtering / FILTERING LOOKUP FIELDS IN DYNAMICS 365

Comments

Popular posts from this blog

Microsoft Dynamics 365 CRM Troubleshooting Solution Import Errors

Remember when CRM life was so much simpler that solutions did not yet exist? If you had separate development and production environments and you wanted to move your customizations, you simply clicked  Export Customizations  and voila! It was done. Those were the days. Nostalgia Warning – in case you’ve forgotten, here’s a screenshot to jog your memory: With CRM 2011, the concept of solutions was introduced, giving us a new set of powers – by picking individual entities, workflows, etc., we now had the ability to group together and move only those customizations we wanted to include in our solution. The next great solutions advancement came with CRM 2016: we can now select specific components within each individual entity – so instead of moving the entire contact entity, for example, we have the option of moving only a certain view or field within the entity. And we can do this without having to hack the xml in the zip file. (By the way, if you want to learn more abou...

How to Filter SubGrid Lookup view in Dynamics 365 CRM

How to Filter SubGrid Lookup view in Dynamics 365 CRM.  Please check the comments in the below code and do follow the steps accordingly and call the  filterSubGrid() funtion on onload. var LastQuery = ""; function filterSubGrid() { debugger; setSubgridLookupFiltering(); } function AddLookupFilter(entity_type, customFilter) { var subgridLookup = Xrm.Page.getControl("lookup_Contacts_Participants"); subgridLookup.addCustomFilter(customFilter, entity_type); } function setSubgridLookupFiltering() { var subgridAddButtonId = "Contacts_Participants_addImageButton"; //Try to get the element from both the current and the parent document. var subgridAddButton = document.getElementById(subgridAddButtonId) || window.parent.document.getElementById(subgridAddButtonId); //This script may run before the subgrid has been fully loaded on the form. If this is the case, //delay and retry until the subgrid has been loaded. if (subg...

How to prevent record from saving in Dynamics CRM using Javascript

  From time to time you might need to add some validation to the save event of an entity, this actually used to be an approach I would use on a regular basis but since the introduction of business rules have found myself doing this less and less. But still, knowing the ability is available is handy. When you define the onsave event function, you must tick the “Pass execution contact as first parameter” option. (See below) Having done that you can create an onSave function with code similar to the example I have shown below. Note forgetting the “(context)”, which will take the context parameter allowing you to prevent the save when needed. function onSave(context) { var saveEvent = context.getEventArgs(); if (Xrm.Page.getAttribute("telephone1").getValue() == null) { // *** Note: I am using an alert for testing a notification maybe better! alert("Put in a phone number!"); saveEvent.preventDefault(); } } Note: This simple example might be better achi...