Thursday, 9 January 2020

What happens when a user is Assigned Multiple Security Roles in Microsoft Dynamics 365 CRM

What happens when a user is assigned multiple security roles in Microsoft Dynamics CRM?

In smaller organizations, you may find situations when a Manager would like to have access to both a Sales Profile and a Service Profile in Microsoft Dynamics CRM.
You may wonder what exactly happens when a user is assigned multiple security roles.
Assume that a user is assigned the profiles shown below in the screenshot. You see that there are different access levels set for each profile. 

You will that when the user gets assigned to both ‘Baseline for all users’ and ‘Sales Person’ profiles, the access levels get combined, and the user then has permissions as shown in the ‘Effective Permissions’ section.

So you see that when a user is assigned multiple roles, the user gains the permissions associated with each role.

Thursday, 2 January 2020

How to Filter Sub-Grid in Dynamics 365

In this example, I've added an "Accounts" sub-grid to my Account, configured to show "All Record Types" rather than "Only Related Records". The using this JavaScript we're filtering the sub-grid to display all the Accounts that the Primary Contact is a Primary Contact of (which will obviously include the current account). This function can be added to the form OnLoad and Primary Contact field OnChange to ensure the sub-grid is updated when the Primary Contact changes as well.
NOTE: I've found it best to create a custom view to be used as the default sub-grid view, and to customize this view to display no results by default (using a filter such as: Name equals "X" and Name does not equal "X" – which will always return no results), this way you won't see incorrect data initially on load before the JavaScript kicks in.
// Generic function to perform the filtering - this function shouldn't need to change
function filterSubGrid(subgridName, fetchXml, attempts) {
    // Try 10 times, then stop
    if (attempts < 0) { return; }

    var crmWindow = Xrm.Internal.isTurboForm() ? parent.window : window;

    // Get the subgrid element to filter
    var subgrid = crmWindow.document.getElementById(subgridName);
    if (subgrid == null || subgrid.control == null) {
        // If the subgrid hasn't loaded yet, keep trying
        setTimeout(function () { filterSubGrid(subgridName, fetchXml, (attempts || 10) - 1); }, 500);
        return;
    }

    // Update the fetchXml on the subgrid and refresh the grid
    subgrid.control.SetParameter("fetchXml", fetchXml);
    subgrid.control.refresh();
}

// Filters an accounts subgrid by the primary contact ID - this function is unique for your requirements
function filterAccountGrid() {
    // Get the dynamic contactId to filter on
    var contactValue = Xrm.Page.getAttribute("primarycontactid").getValue();

    // If the contact is null display nothing 
    var contactId = "00000000-0000-0000-0000-000000000000";
    if (contactValue != null) {
        contactId = contactValue[0].id;
    }

    // Fetch xml code which will retrieve all the accounts related to the contact 
    var fetchXml = "<fetch version='1.0' output-format='xml-platform' mapping='logical' distinct='false'>" +
    "  <entity name='account'>" +
    "    <attribute name='name' />" +
    "    <attribute name='address1_city' />" +
    "    <attribute name='primarycontactid' />" +
    "    <attribute name='telephone1' />" +
    "    <attribute name='accountid' />" +
    "    <order attribute='name' descending='false' />" +
    "    <filter type='and'>" +
    "      <condition attribute='primarycontactid' operator='eq' uitype='contact' value='" + contactId + "' />" +
    "    </filter>" +
    "    <link-entity name='contact' from='contactid' to='primarycontactid' visible='false' link-type='outer' alias='accountprimarycontactidcontactcontactid'>" +
    "      <attribute name='emailaddress1' />" +
    "    </link-entity>" +
    "  </entity>" +
    "</fetch>";

    filterSubGrid("Accounts", fetchXml);
}
Note: This code is unsupported, and is likely to break in any major releases (as it has in the past). The idea of sourcing this project on GitHub is that if/when it does break again, it can be updated here rather than having to release new blog posts and hoping people who have previously used it see it. Also if it breaks in an update and I don't get a chance to fix it, someone else can fix it :)

Wednesday, 25 December 2019

How to add a TinyMCE editor for description fields in Dynamics 365

Microsoft Dynamics CRM, although has support for various kinds of fields to be placed on its forms, it does not provide a rich text editor natively. There are several use cases where a rich text editor would be very useful. One such case is when content from CRM needs to be displayed on web pages.

TinyMCE is an awesome HTML editor freely available and extensively used in web applications. So, why not use that and embed in a CRM form? you will have the ability to include the editor on any form for any entity and it will allow our users to add some proper formatting and some extra goodies such as tables and source code without issue.

OOB Email Editor:


TinyMCE Email Editor:


Solution

Getting an API Key for TinyMCE

First step is, we need an API Key which is provided for free by TinyMCE Go to the link below and ‘Sign up for a free API key’ and sign up as required.


It will ask you for the domain, be sure to enter the primary domain your CRM instance uses. For cloud implementations of CRM this will be along the lines of *company*.crm.dynamics.com
Copy and API Key and save it in notepad.

Adding TinyMCE to Dynamics 365 Form

First, we need to create a Web Resource(.html) file as image below.


2. Now copy the code into the above resource and replace the *APIKEY* placeholder on line 15 with your own API Key which we have obtained from the previous step..
<html><head>
<script src="//ajax.googleapis.com/ajax/libs/jquery/1.10.2/jquery.min.js"></script>
<meta charset="utf-8">
<title>Email Editor</title>
<script>
$.ajaxSetup({
cache: true
});
function updateEmailForm() {
window.parent.Xrm.Page.getAttribute("description").setValue(tinymce.get("editbox").getContent());
}

$(document).ready(function() {
var emailBody = parent.Xrm.Page.getAttribute("description").getValue();
var tinymcesource = 'https://cloud.tinymce.com/stable/tinymce.min.js?apiKey=*APIKEY*'
if (typeof tinymce == "undefined") {
$.getScript(tinymcesource, function() {
window.tinymce.dom.Event.domLoaded = true;
tinymce.init({
selector: 'textarea#editbox',
init_instance_callback: function (editor) {
editor.on('NodeChange', function (e) {
updateEmailForm();
});
},
plugins: [
'advlist autolink lists link image charmap print preview anchor',
'searchreplace visualblocks code fullscreen',
'insertdatetime media table contextmenu paste'
],
toolbar: 'undo redo | styleselect | bold italic | alignleft aligncenter alignright alignjustify | bullist numlist outdent indent | link image preview'
});
});
$('#editbox').html(emailBody);
}
});
</script>
<meta></head>
<body style="margin:0px 0px 0px 0px;">
<div id="editdiv">
<textarea id="editbox" style="width: 800px; height: 240px;; "></textarea>
</div>
</body></html>
REPORT THIS A
3. Now go to the email form customization window, select the ‘INSERT’ tab at the top left then click ‘Web Resource’ on the right-hand side.

4. You should now be seeing a dialogue window with several required fields. Type the web resource name and Select the .html file you saved earlier in the above step.


5. Now you will be seeing the ‘Web Resource Properties’ window and fill in the Name and label like the image below.


6. Click Ok. And then now the new Web Resource will appear on the form.

7. Now double-clock the newly created web resource and navigate to the formatting tab and change the ‘Number of Rows’ to be from 6 to 15.

8. Click Save and then Publish the CRM Form

Now refresh the email form you will see be something similar to the image below.


Monday, 23 December 2019

How To Disable Unified Interface in Dynamics 365

All current version Microsoft Dynamics 365 trials and environments are defaulted to the “Unified Interface Only” setting.  This is a good thing since Microsoft Dynamics 365 Unified Interface is here to stay and the previous “Legacy Web Client” interface is deprecated as of September 2019. 
image
For certain situations where we need to run “Legacy Web Client” such as for testing existing setups – how do we enable our “Legacy Web Client” interface?
Firstly – the setting “Use Unified Interface only” is no longer listed under the Dynamics 365 Client’s Advanced Settings >> Administration >> System Settings >> General area
image
So where did it go?
The “Use Unified Interface only” setting is now found in the Power Platform Admin center!
Here are the steps to navigate to this setting:
Open Power Platform Admin center >> click Environments >> select the Dynamics 365 environment >> click the Settings button >> click the Behavior setting >> disable or enable the “Use Unified Interface only” setting
image
image
image

Wednesday, 11 December 2019

How to Filter Lookup Fields in Microsoft Dynamics 365 CRM

In Dynamics 365, we can filter lookup fields without writing code. In this post, we will look at an out of the box field example and a custom example.
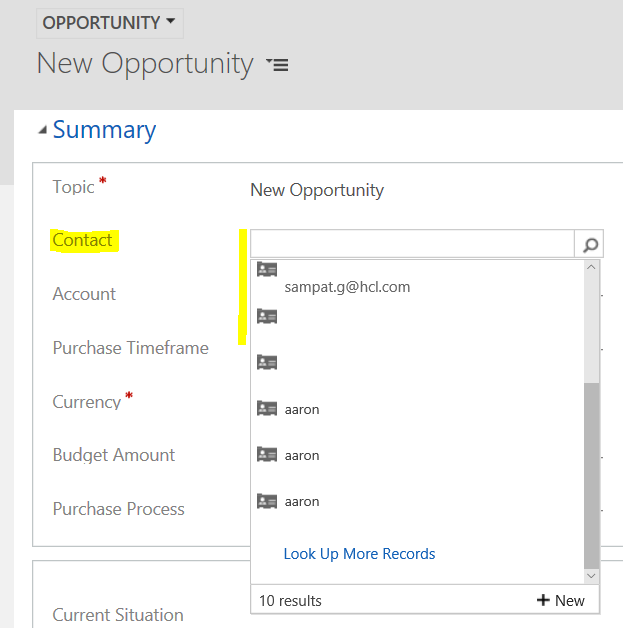
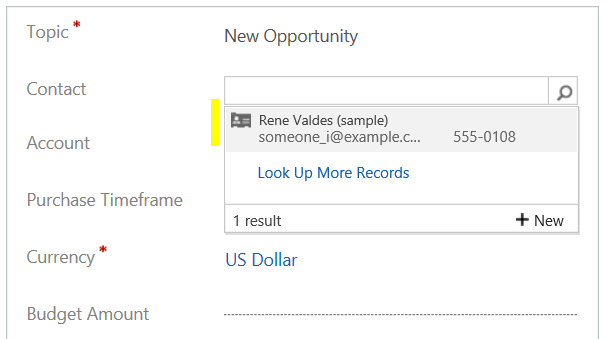
The common out of the box example is filtering a contact based on an account. If we create a new Opportunity, we can see if we look at the Contacts field, we see all contacts in the system:
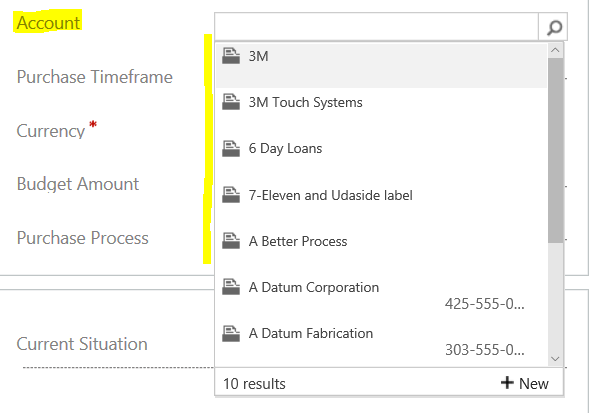
And the same with Accounts:
If we were to select an Account or a Contact, it won’t filter the corresponding field. E.g. if we selected 3M as the account, it would be useful if the system only showed us contacts for 3M, but this is not the case. Likewise, selecting a contact that belongs to A Datum Corporation does not filter the account to A Datum Corporation.
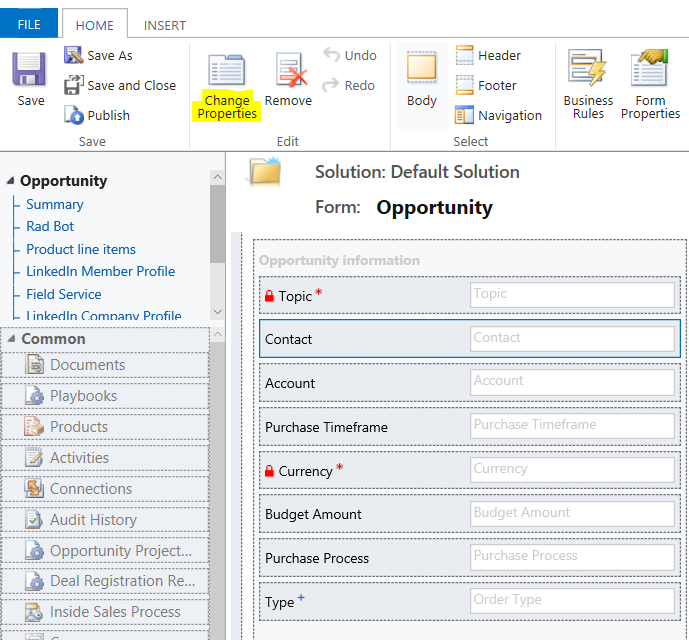
In order to achieve this, we can use the Related Records Filtering property on the Contact field. Open the form in design view, and select the Contact field, then click Change Properties:
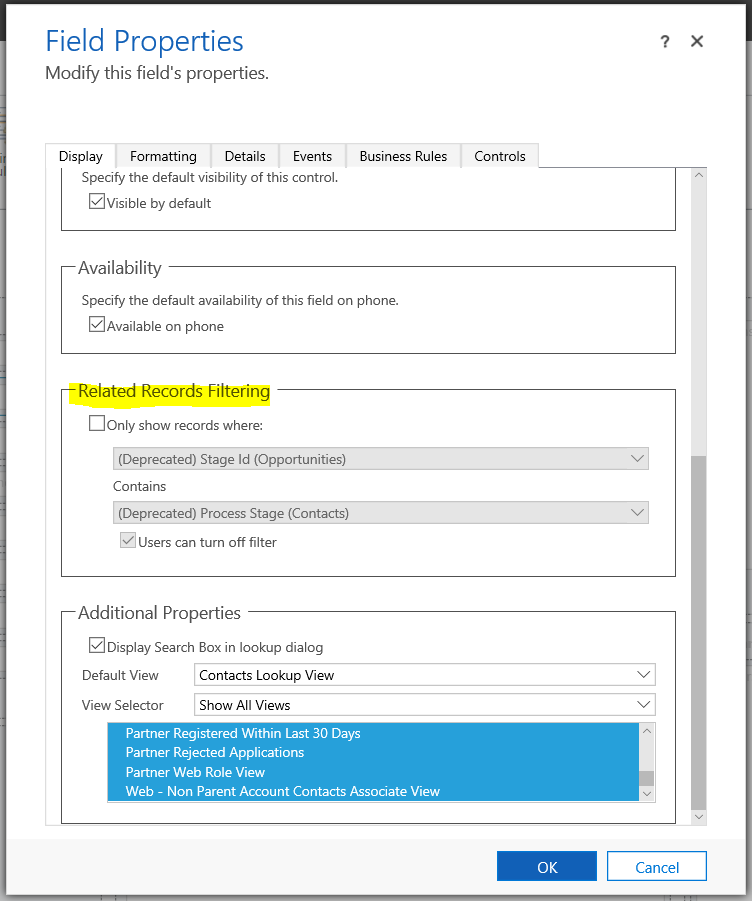
You will see Related Records Filtering:
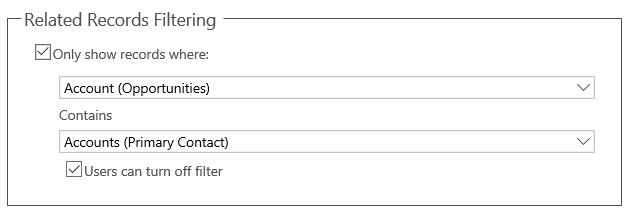
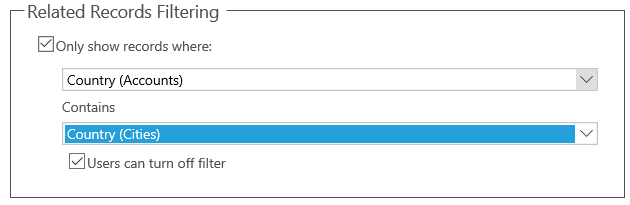
Click the checkbox, and select to only show records where Account (Opportunities) Contains Accounts (Primary Contact).
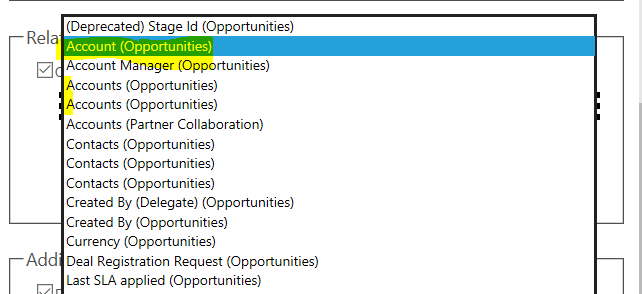
Note you may see multiple occurrences of Account (Opportunities), as there are multiple relationships defined between Accounts and Contacts. You will need to select the right one that contains Accounts (Primary Contact):
It should then look like below:
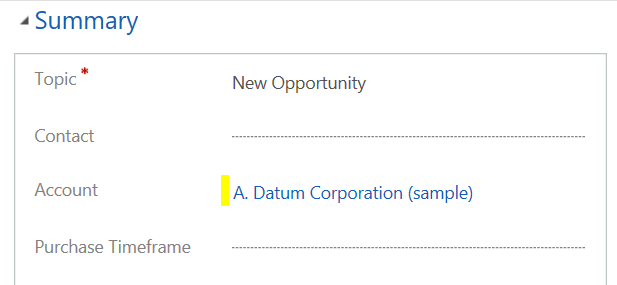
Now, create a new opportunity, and select an Account:
Now use the drop down to select a contact. You will see the contacts have been filtered to only show the primary contact for this account, as selected on the account record:
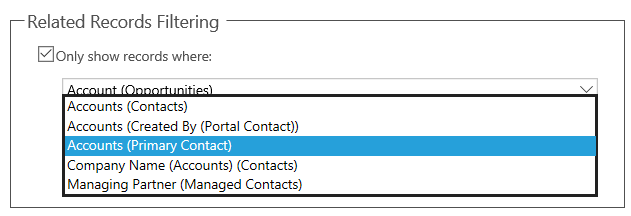
Note the related records filtering is based on the relationships. In the above example, we can see the following options:
  • Accounts (Contacts)
  • Accounts (Created by Portal Contact)
  • Accounts (Primary Contact)
  • Company Name (Accounts) (Contacts)
  • Managing Partner (Managed Contacts)
These are based on the Account-Contact relationships.
If we look at the 1:N relationships for Accounts, we can see the following for Contacts:
If we look at the N:1 relationships for Accounts, we can see the following for Contacts:
Now for the custom example. Let’s say we have 2 custom entities, Country and City. We would like to filter the city based on the country selected.
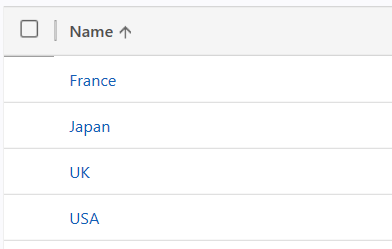
Our Countries list looks like:
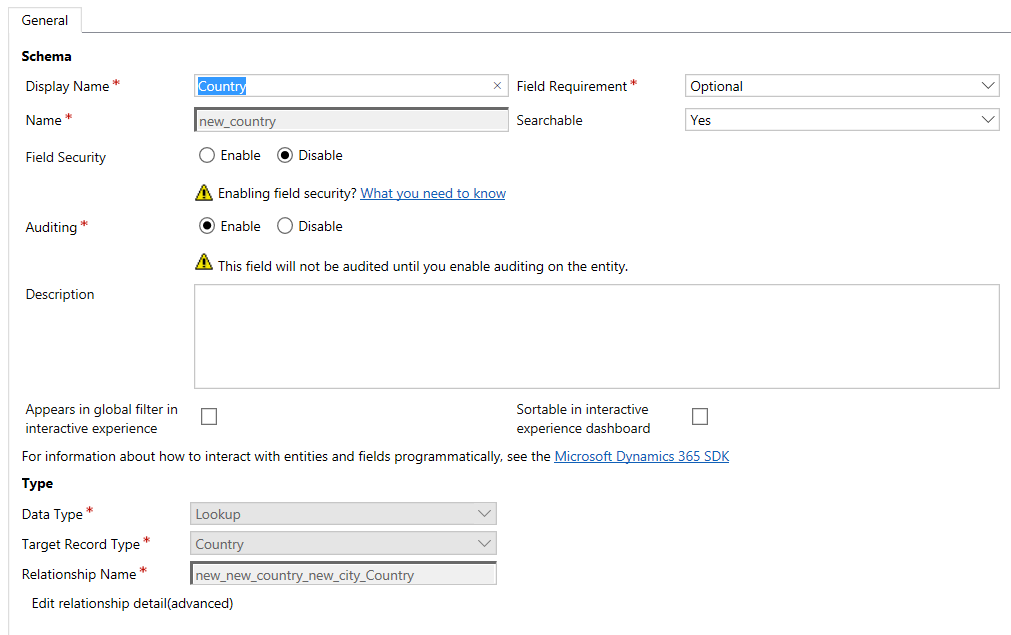
We will add a lookup field to the City entity called Country:
This will create a N:1 relationship:
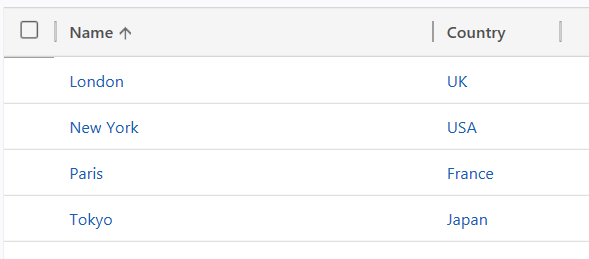
Our cities now look like this, with the associated country filled in:
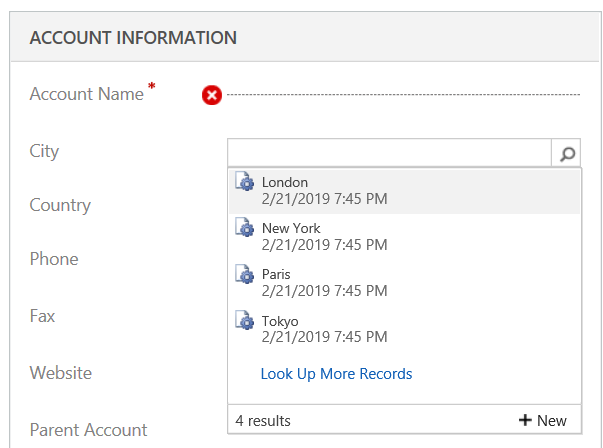
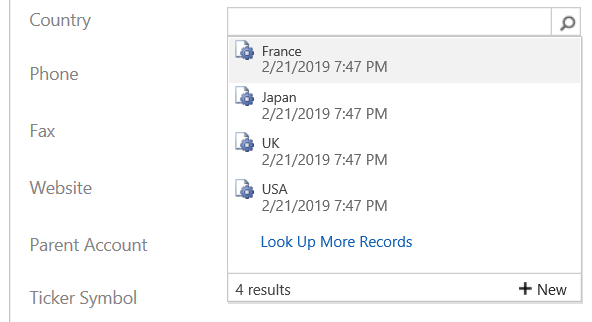
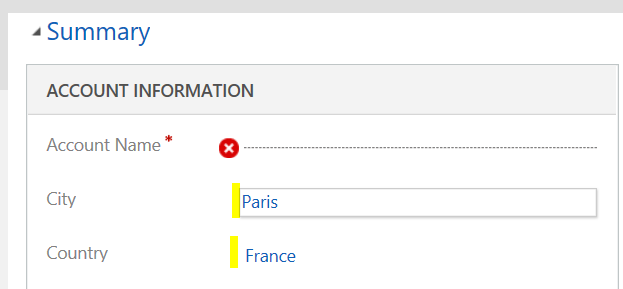
Now on the Account form, add the 2 new fields, save and publish. If we were to select a country and then a city, we would not yet get the filter:
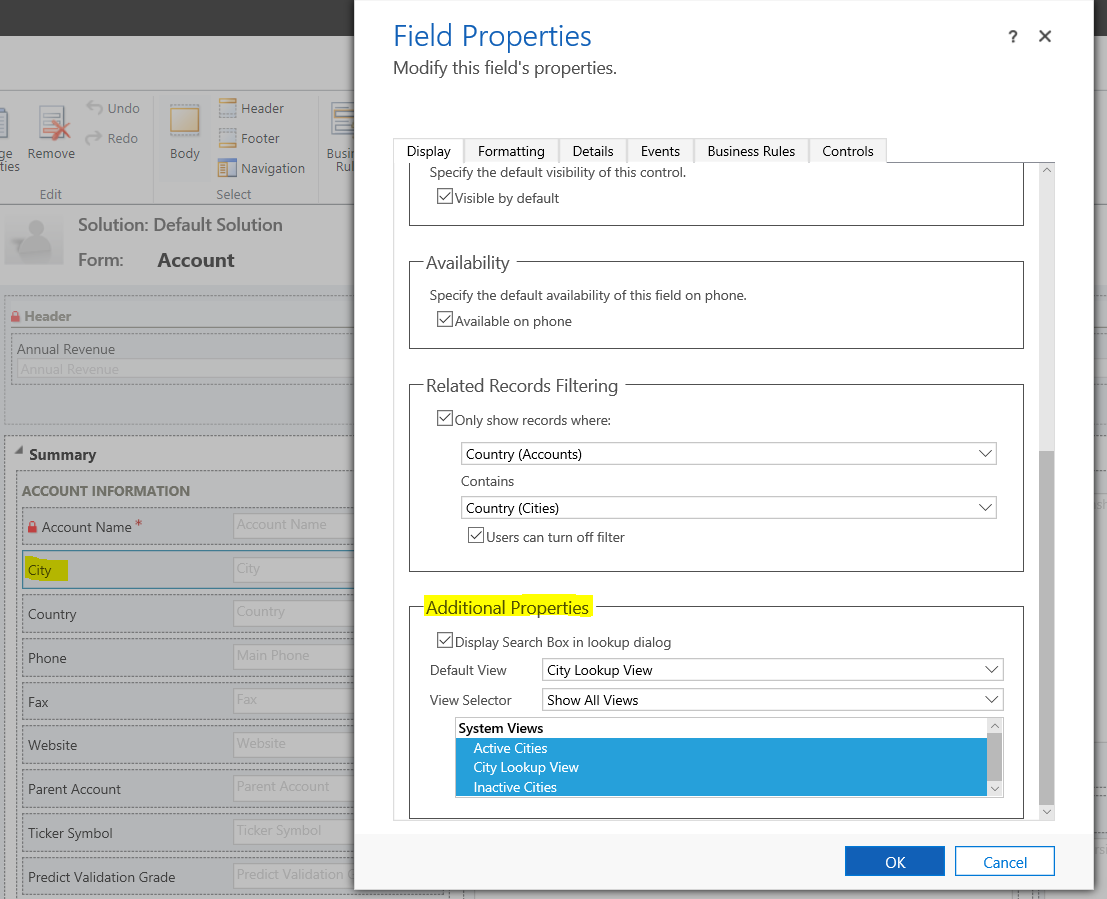
The final step is to add the Related Record Filter on the City field on the Accounts form:
Now, when we select a country on the Account form, it will be filtered to only show cities relating to that country:


Other Usefull Links
 Dynamics 365: Lookup Field Filtering / FILTERING LOOKUP FIELDS IN DYNAMICS 365

How to disable Auto-Save in Dynamics 365 for Specfic form

How to disable auto-save for a form

If you wish to disable auto-save for specific entity forms, you can do this by adding code to the OnSave event in the entity form.
1. Create a JavaScript web resource and add it to the form
  • Enter the following information in the web resource form:
    • Name: preventAutoSave
    • Display Name: Prevent Auto Save
    • Type: Script (JScript)
  • Next to the Type field, choose Text Editor.
  • In the Source field, paste the following code (see code box below to copy):
auto-save
function preventAutoSave(econtext) {
    var eventArgs = econtext.getEventArgs();
    if (eventArgs.getSaveMode() == 70 || 
eventArgs.getSaveMode() == 2) {
        eventArgs.preventDefault();
    }
}
  • Add the web resource to the Form
2. Configure the OnSave event
  • In the Form Properties window, in the Event Handlers section, set Event to OnSave.
  • Enter the following in the Handler Properties:
    • Type ‘preventAutoSave’ in the Function field. This is case sensitive. Do not include quotation marks.
    • Make sure that Enabled is checked.
    • Check Pass execution context as first parameter.
  • If there are any other event handlers for the OnSave event, use the green arrows to move this one to the top
Auto-save will now be disabled for the form, but data can still be saved by clicking the Auto save button in the lower-right corner. If users attempt to navigate away from a form or close a form where data has been changed, they will get a prompt to save their changes before they can navigate away or close the form.

𝗣𝗼𝘄𝗲𝗿 𝗣𝗹𝗮𝘁𝗳𝗼𝗿𝗺 𝗜𝗻𝘁𝗲𝗿𝘃𝗶𝗲𝘄 𝗤𝘂𝗲𝘀𝘁𝗶𝗼𝗻𝘀 – 𝗕𝗲𝗴𝗶𝗻𝗻𝗲𝗿 𝘁𝗼 𝗘𝘅𝗽𝗲𝗿𝘁

  🔰 𝗣𝗼𝘄𝗲𝗿 𝗣𝗹𝗮𝘁𝗳𝗼𝗿𝗺 𝗜𝗻𝘁𝗲𝗿𝘃𝗶𝗲𝘄 𝗤𝘂𝗲𝘀𝘁𝗶𝗼𝗻𝘀 – 𝗕𝗲𝗴𝗶𝗻𝗻𝗲𝗿 𝘁𝗼 𝗘𝘅𝗽𝗲𝗿𝘁 🚀 🟢 𝗕𝗲𝗴𝗶𝗻𝗻𝗲𝗿 / 𝗝𝘂𝗻...